
Another good read from an author I enjoy: Goodbye Sky Field (A Port Alma Murder Mystery Book 6) by Anne Shillolo. 📚
DC Holly Towns is working on a high-profile meth lab case … but keeps getting drawn closer to a plane crash site and its secrets.

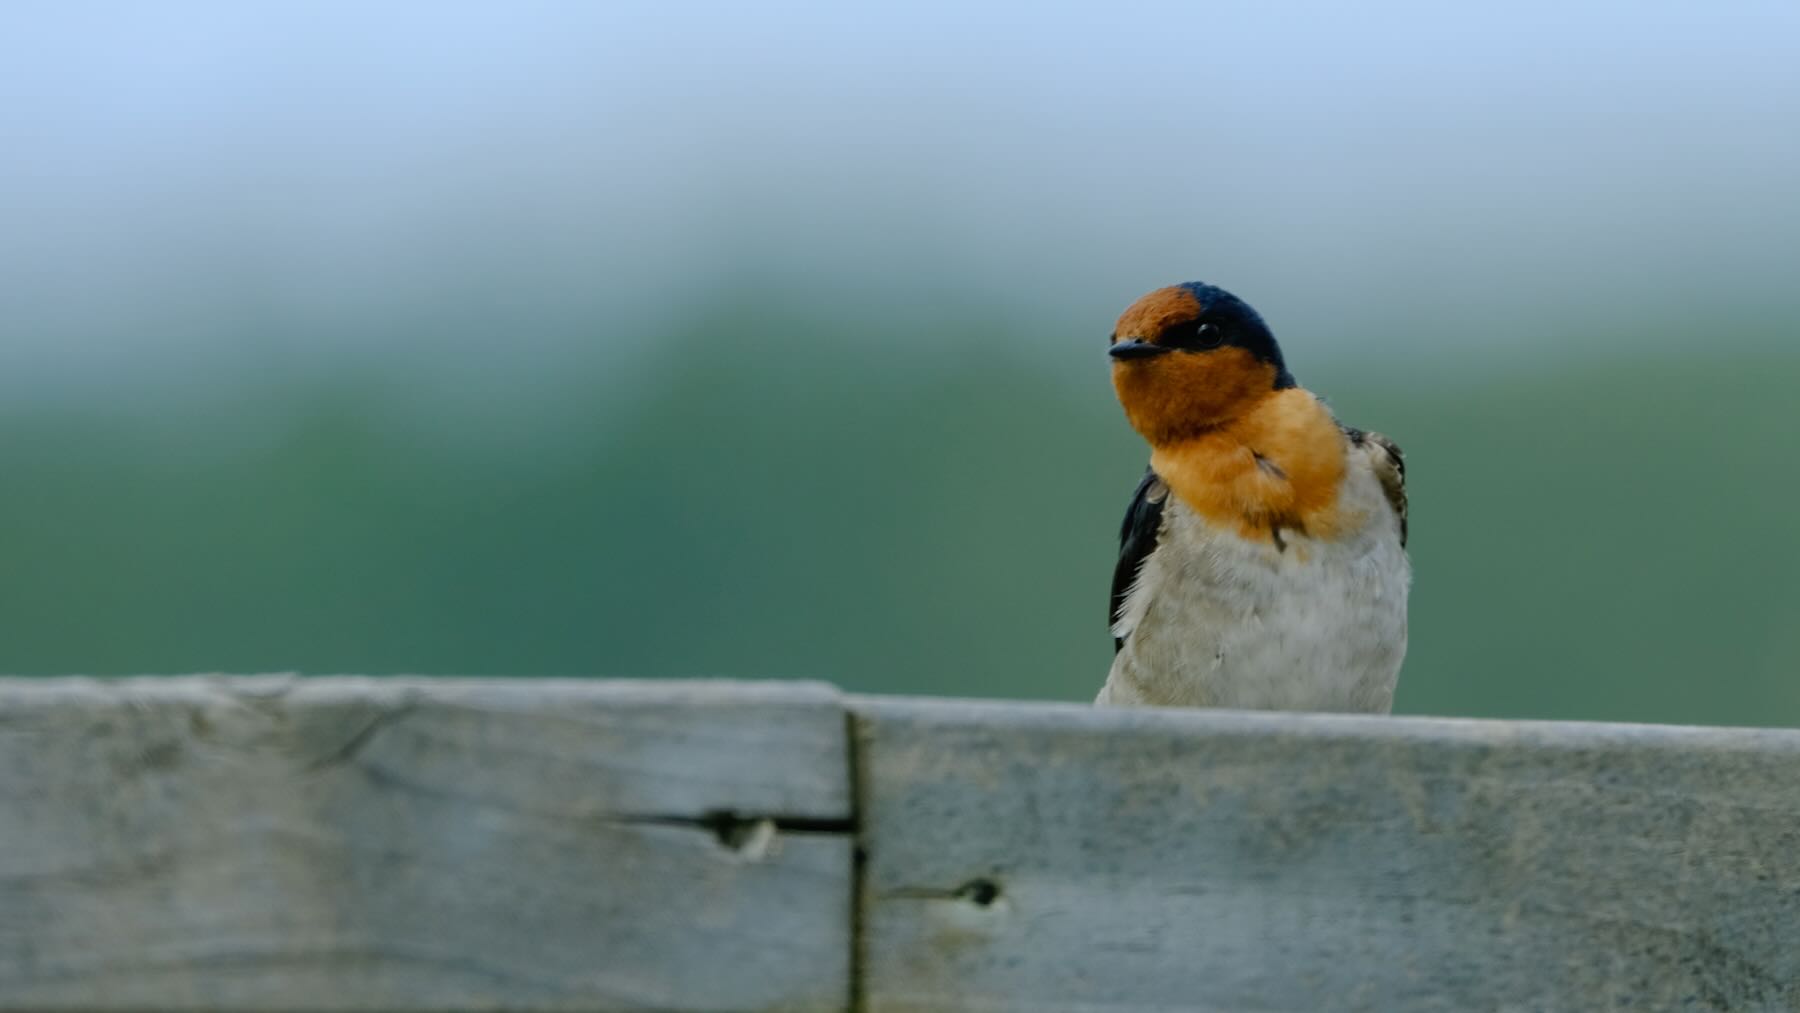
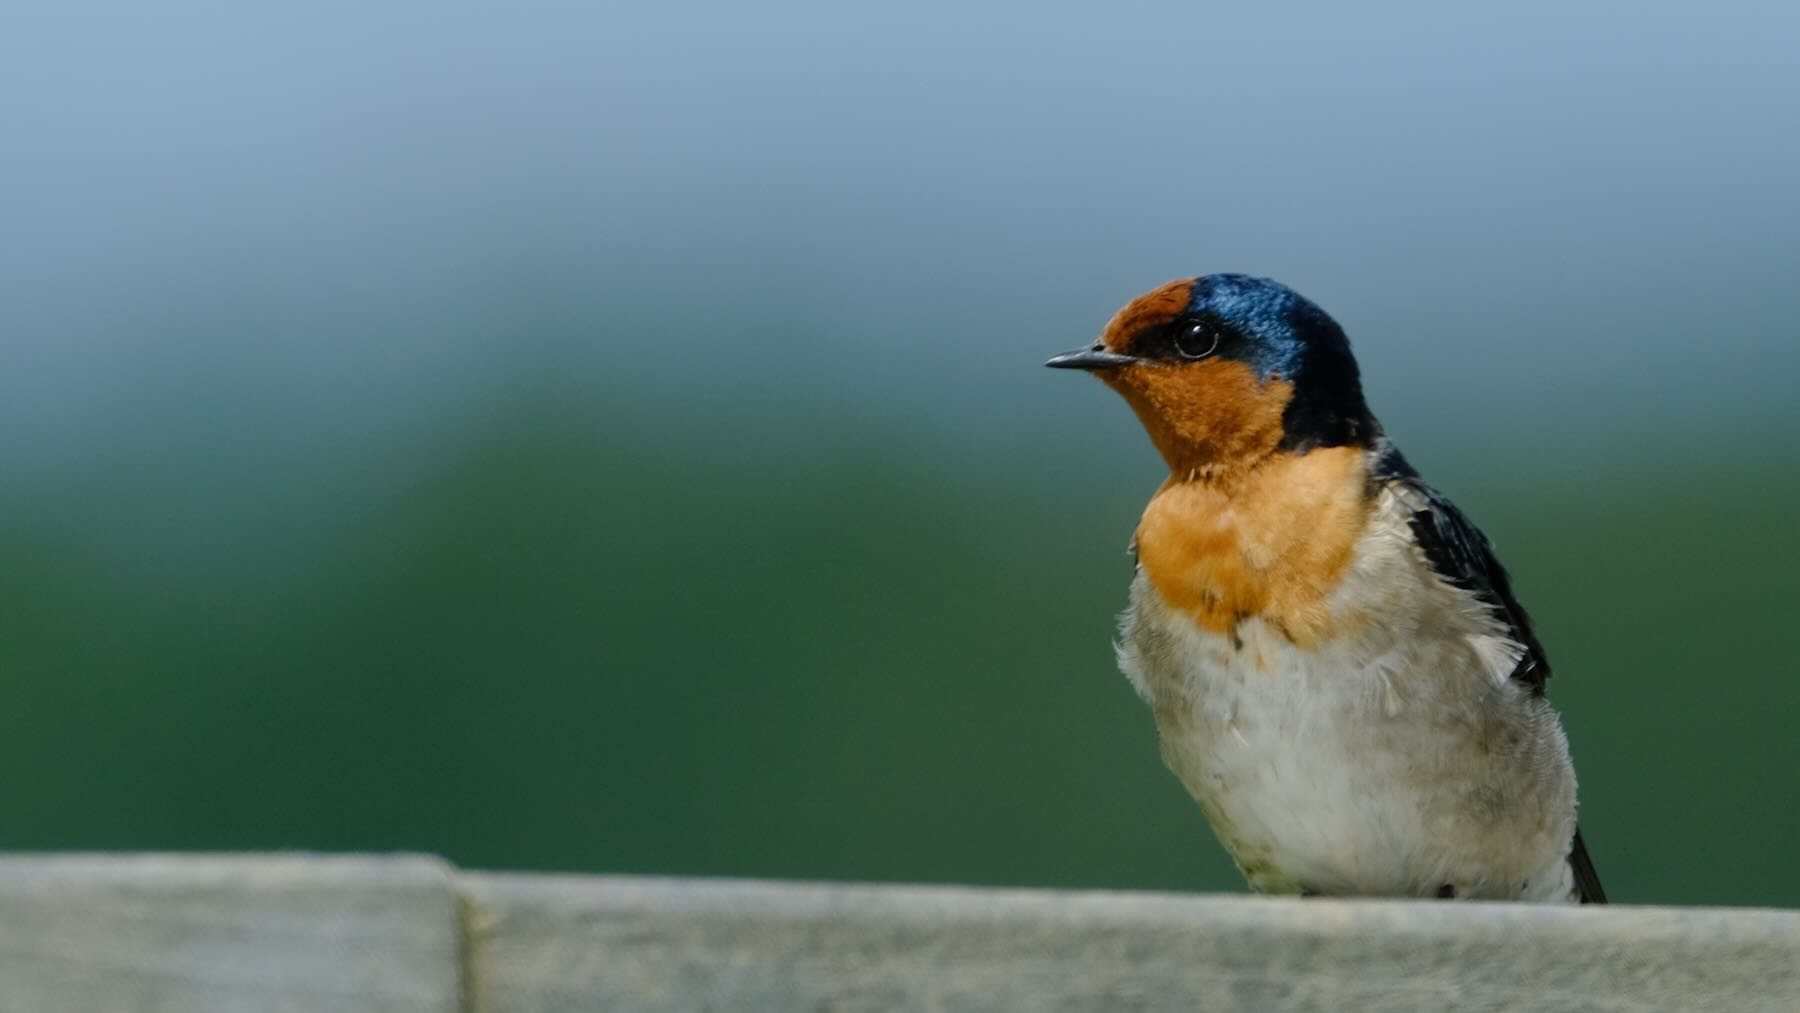
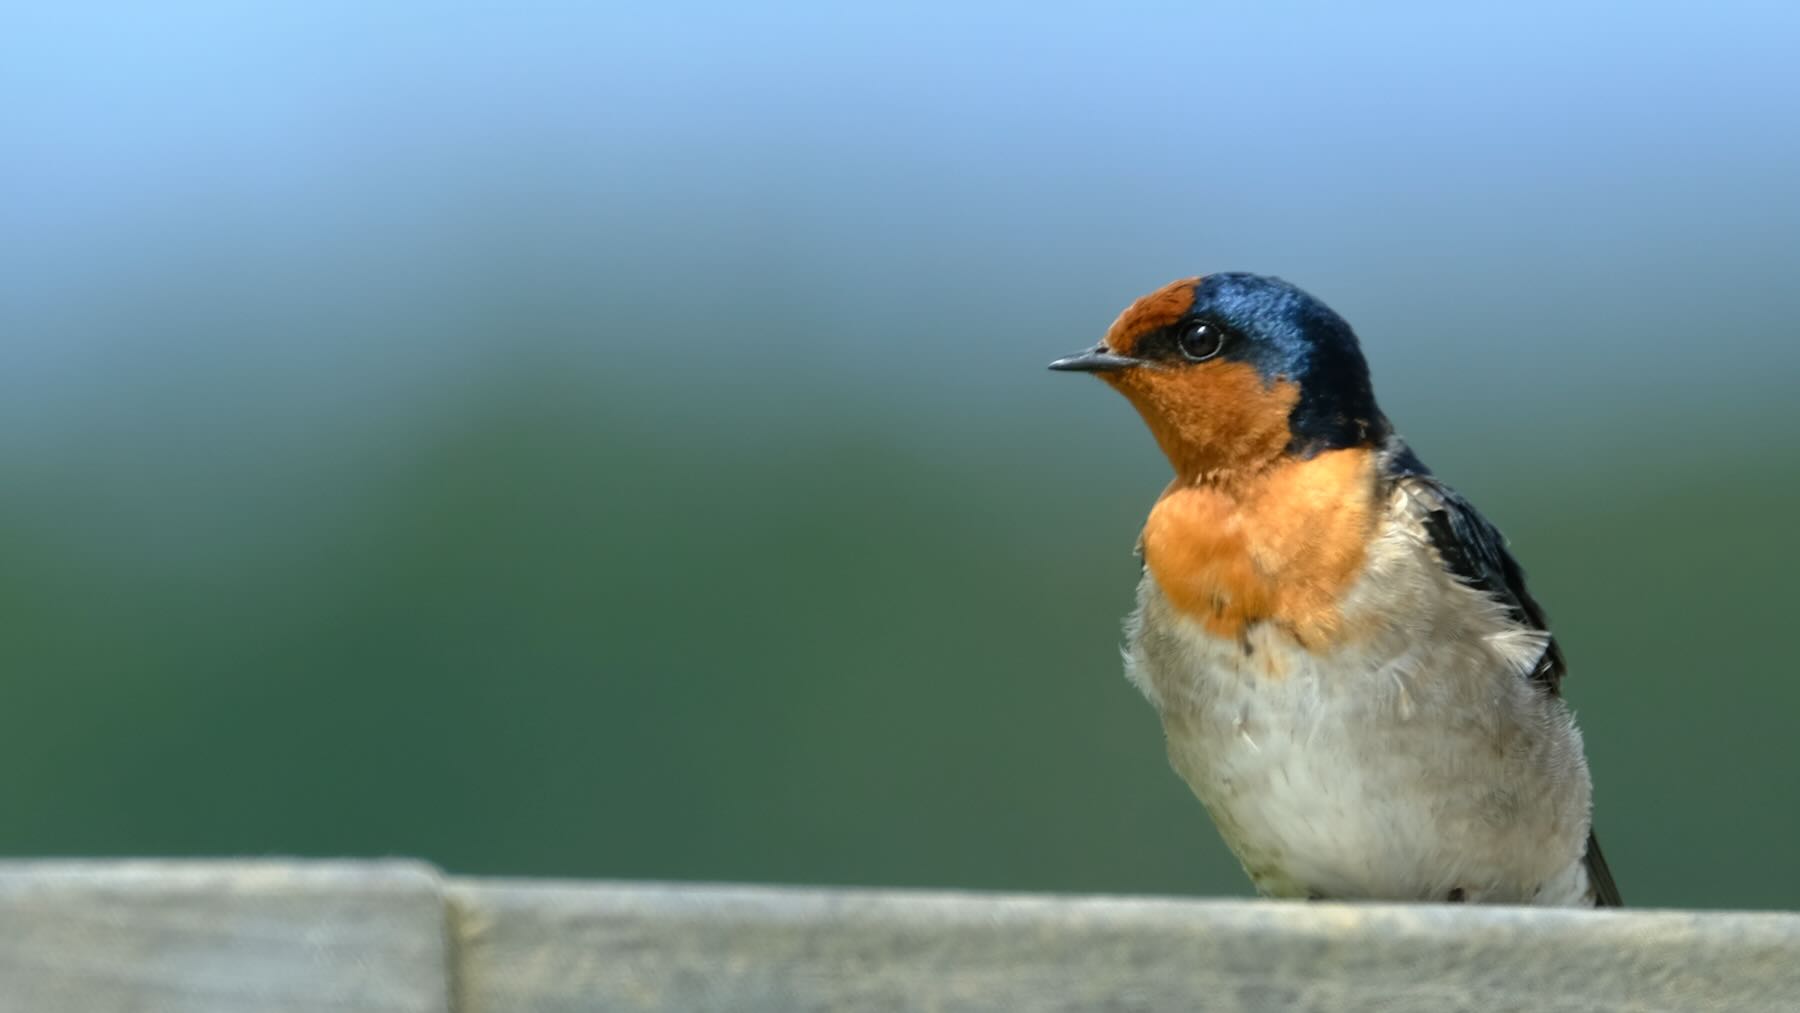
I love Welcome Swallows: they’re small, colourful, fast and generally cute. This one came to sit on our deck railing. Photos through a window. 🐦
LOL: Underbirds are go!
Aotearoa New Zealand’s Bird of the Year competition has started. I think this year I might vote for the Ruru — I thought I heard one last night for the first time round here.

Pleased with myself that today I checked my camera settings before getting click-happy on the shutter. This morning there were about 15 Kuaka feeding on the beach. 🐦

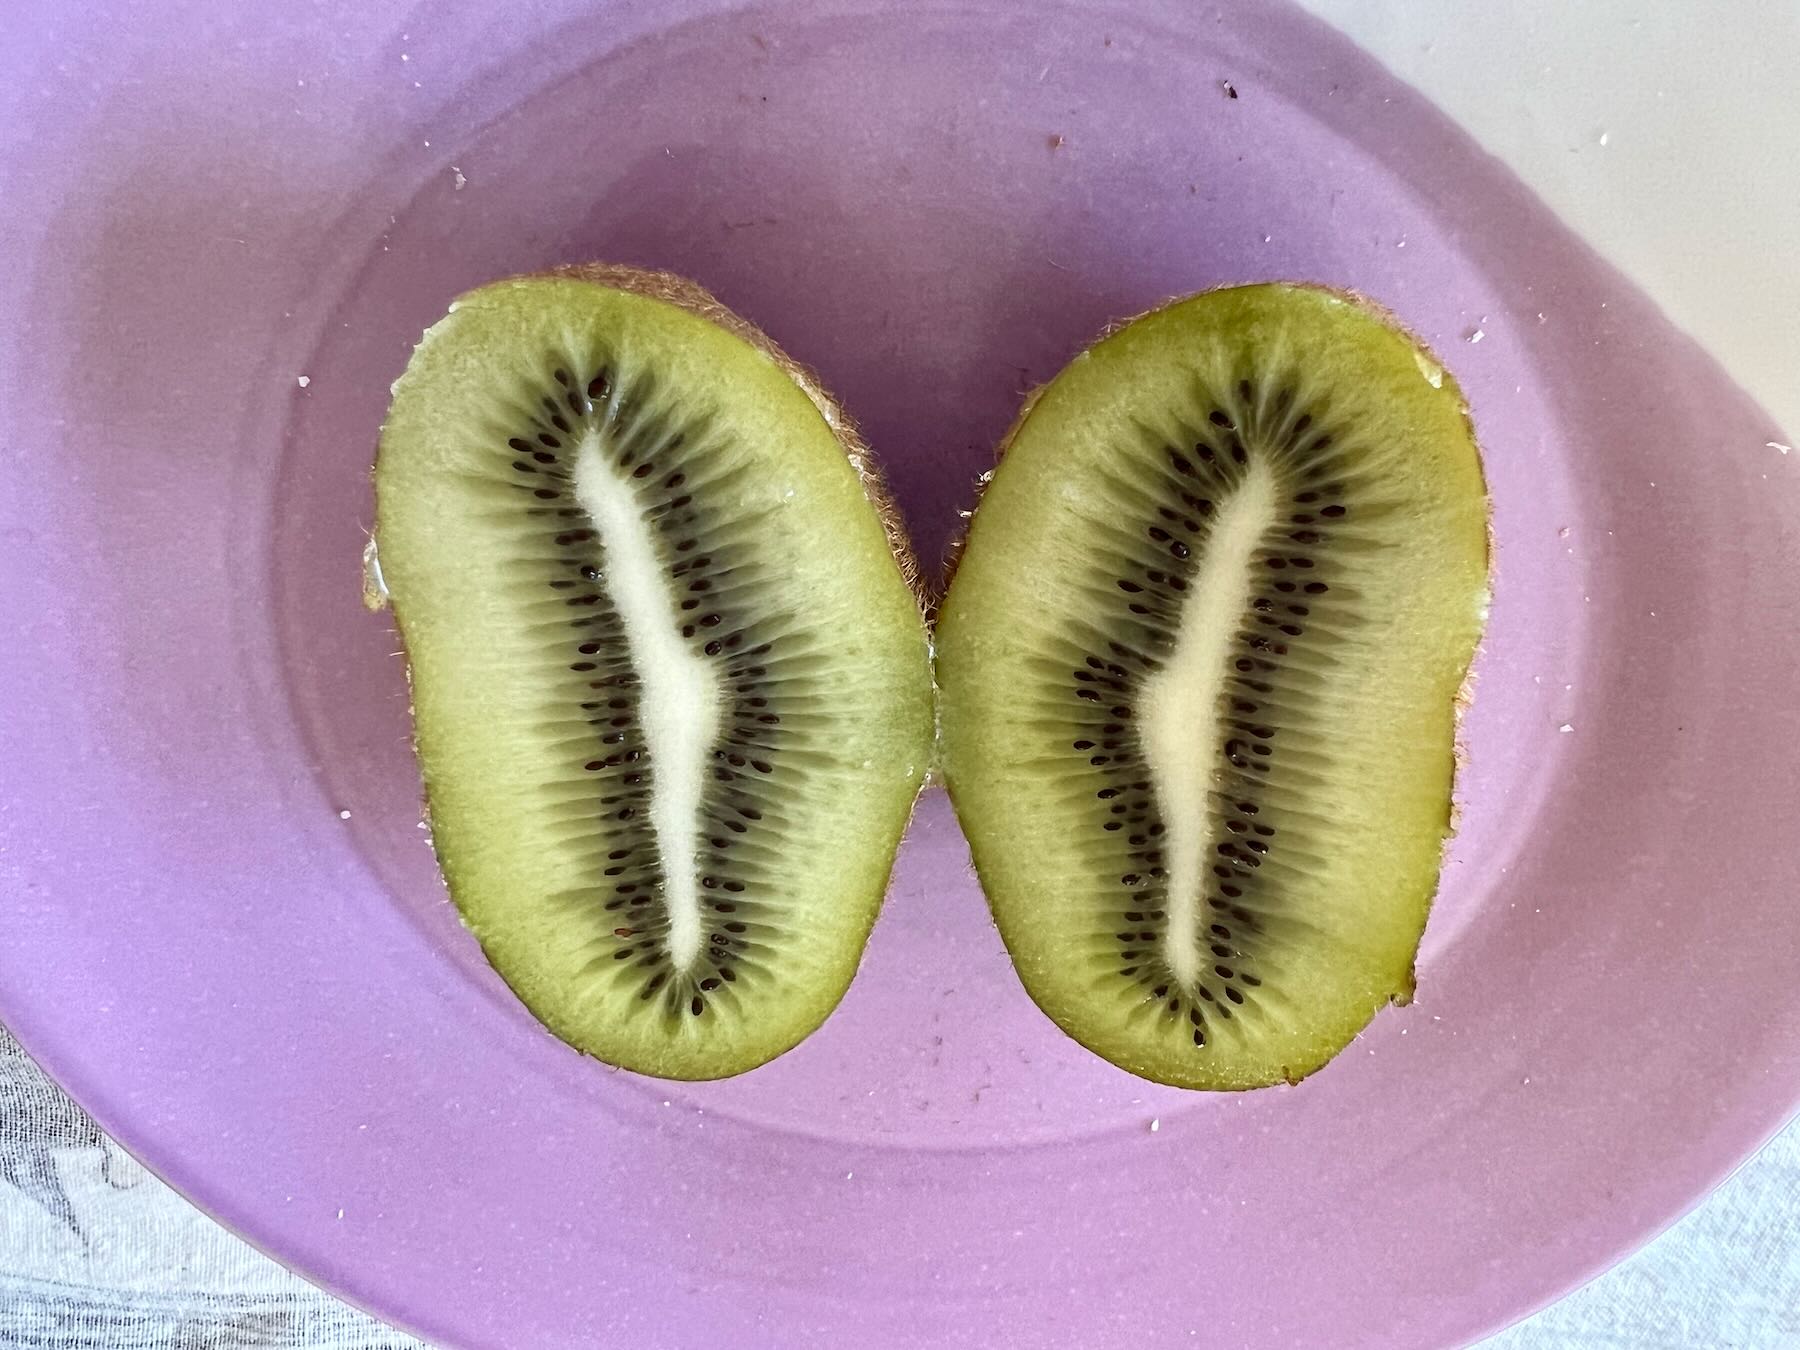
We have some large, though pale, Kiwifruit (from the shops) at the moment. Yum.
Note for people outside NZ: a Kiwi is a] a bird b] a person. A Kiwifruit is an edible delight.
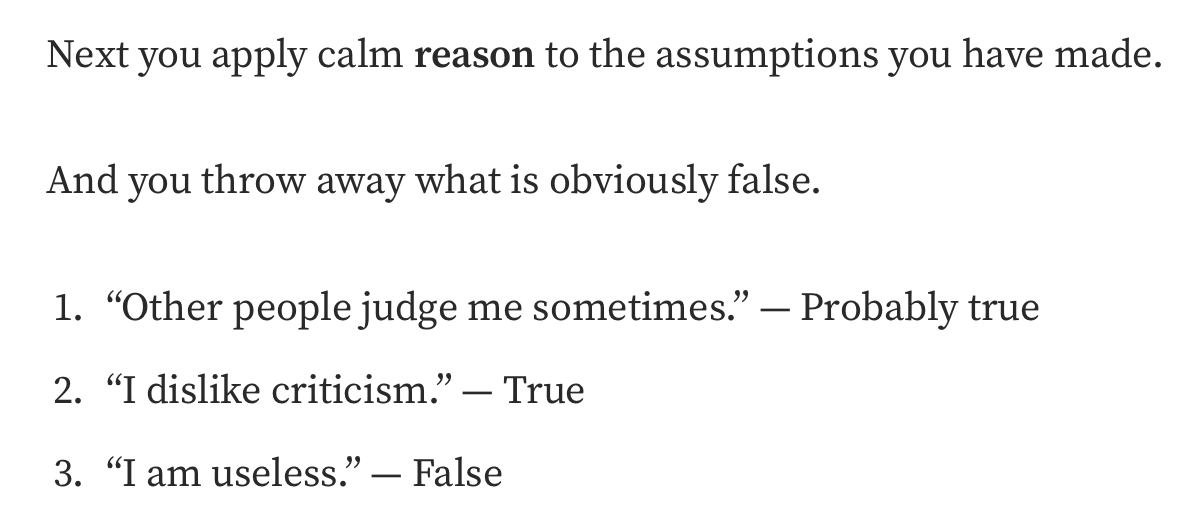
Excellent practical steps — How To Use Stoicism To Remove False Impressions :
apply calm reason to the assumptions
And throw away what is obviously false.
- “Other people judge me sometimes.” — Probably true
- “I dislike criticism.” — True
- “I am useless.” — False
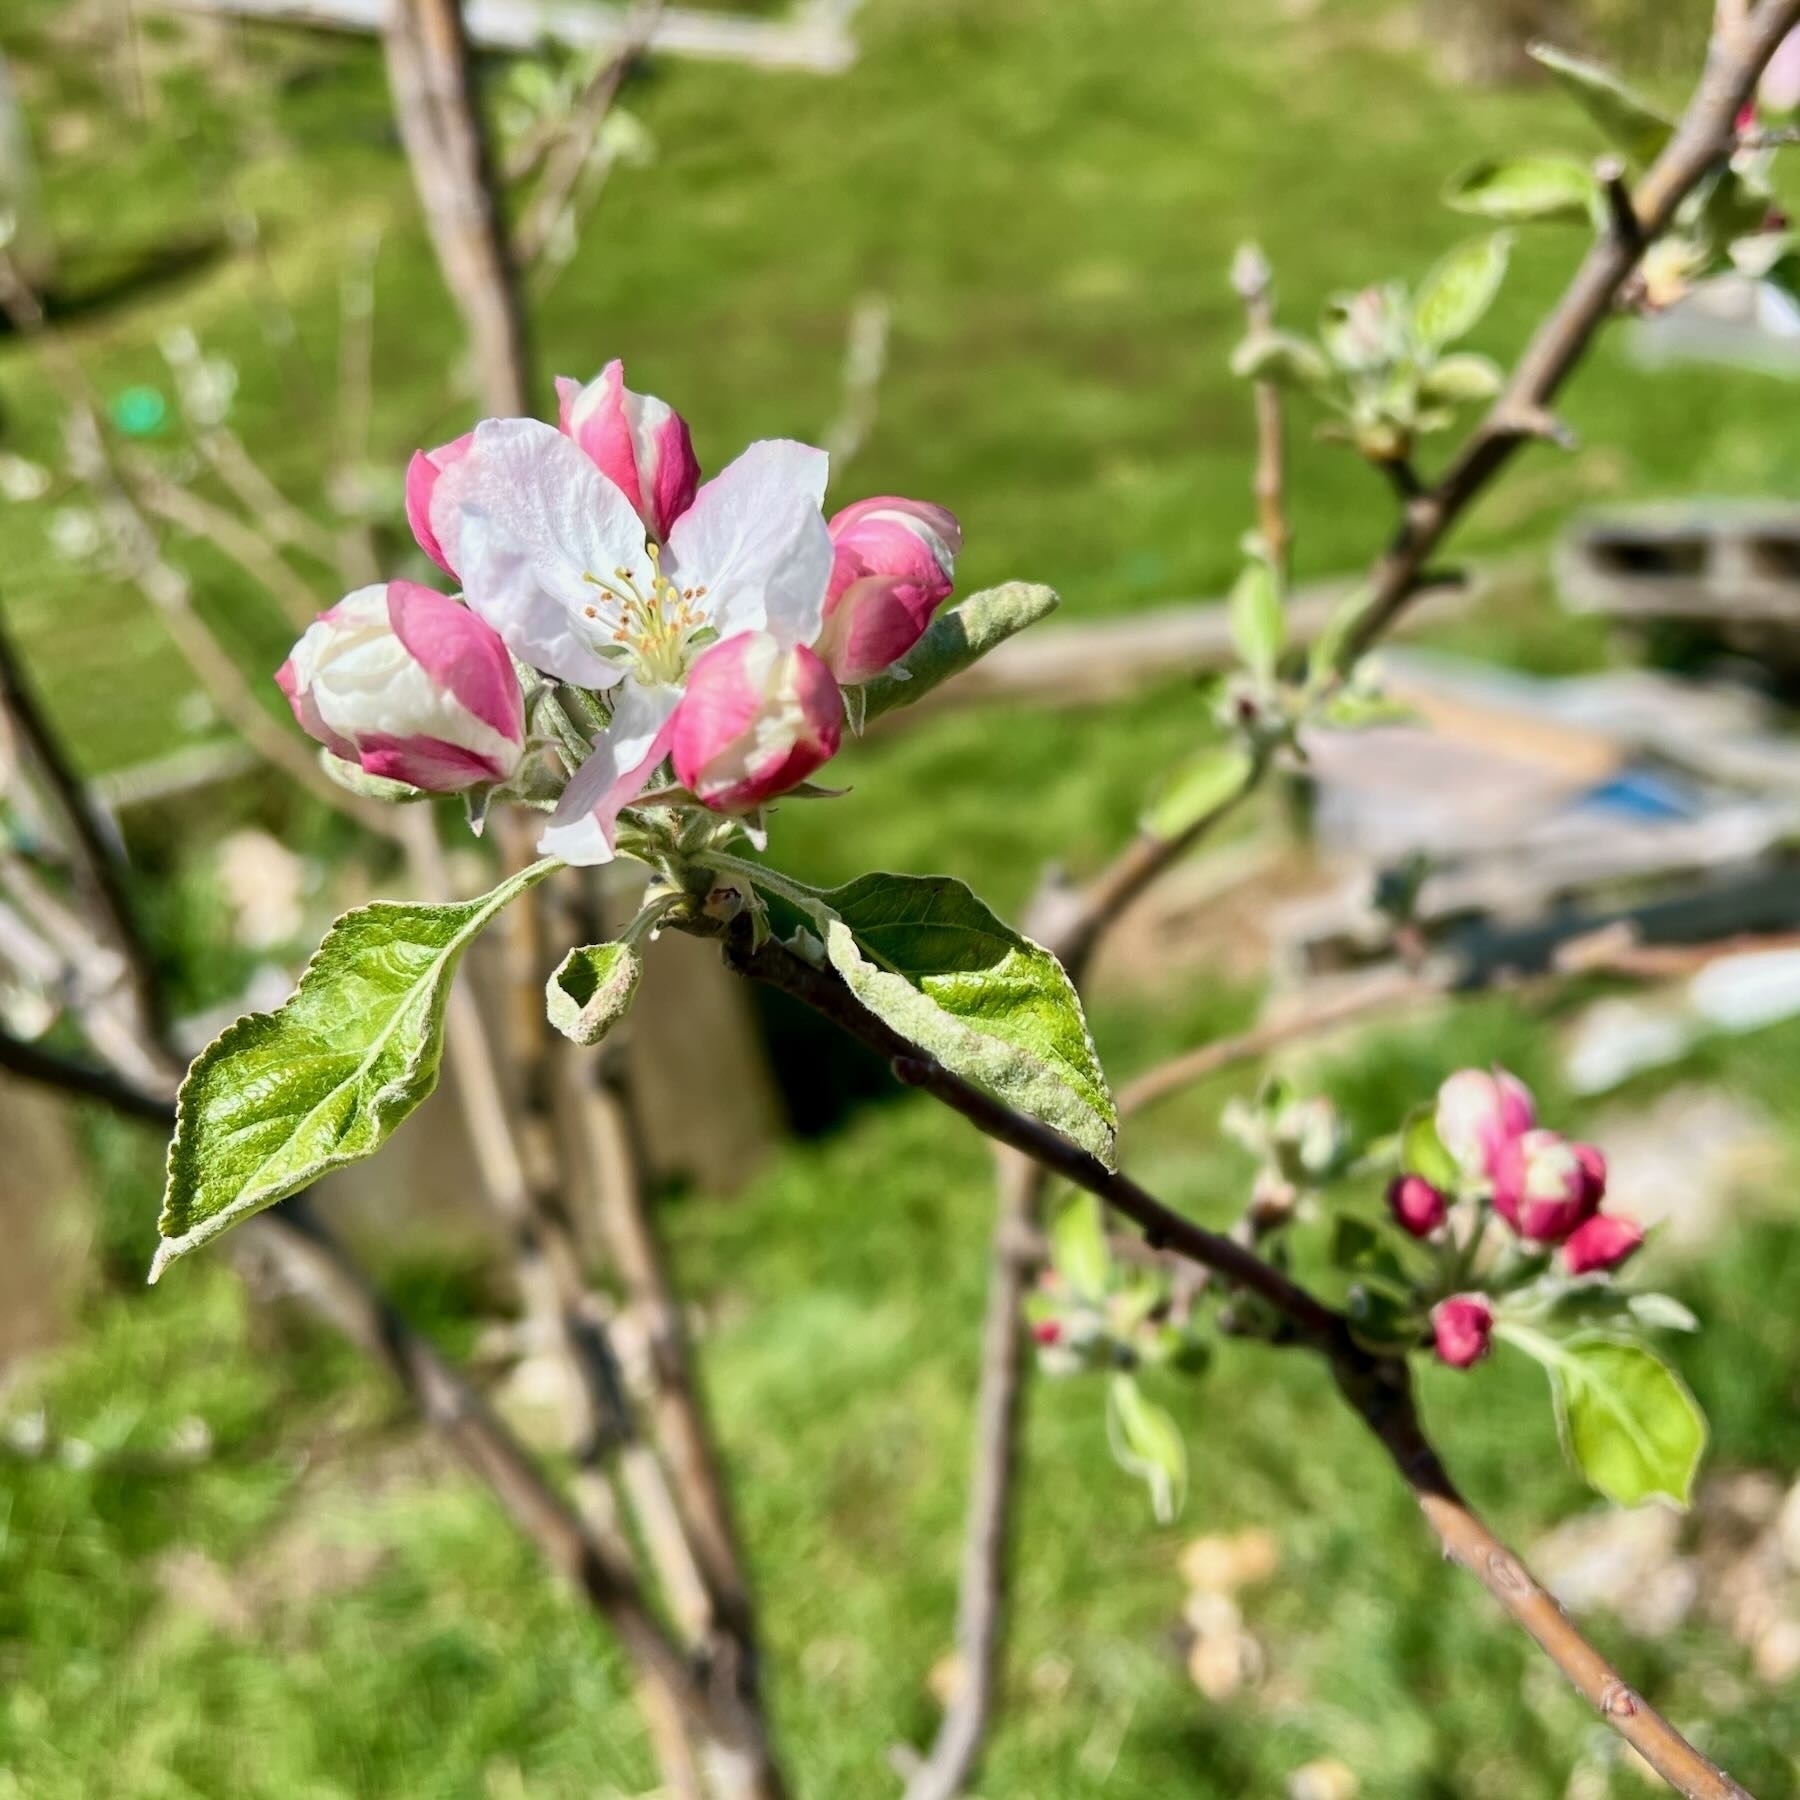
Last year I gathered half a dozen delicious apples from my Granny Smith tree. Right now new blossoms are coming in.
A gorgeous morning at the beach, where the sea was gently lapping tiny waves just like on a tropical island. Kāpiti Island in the background.

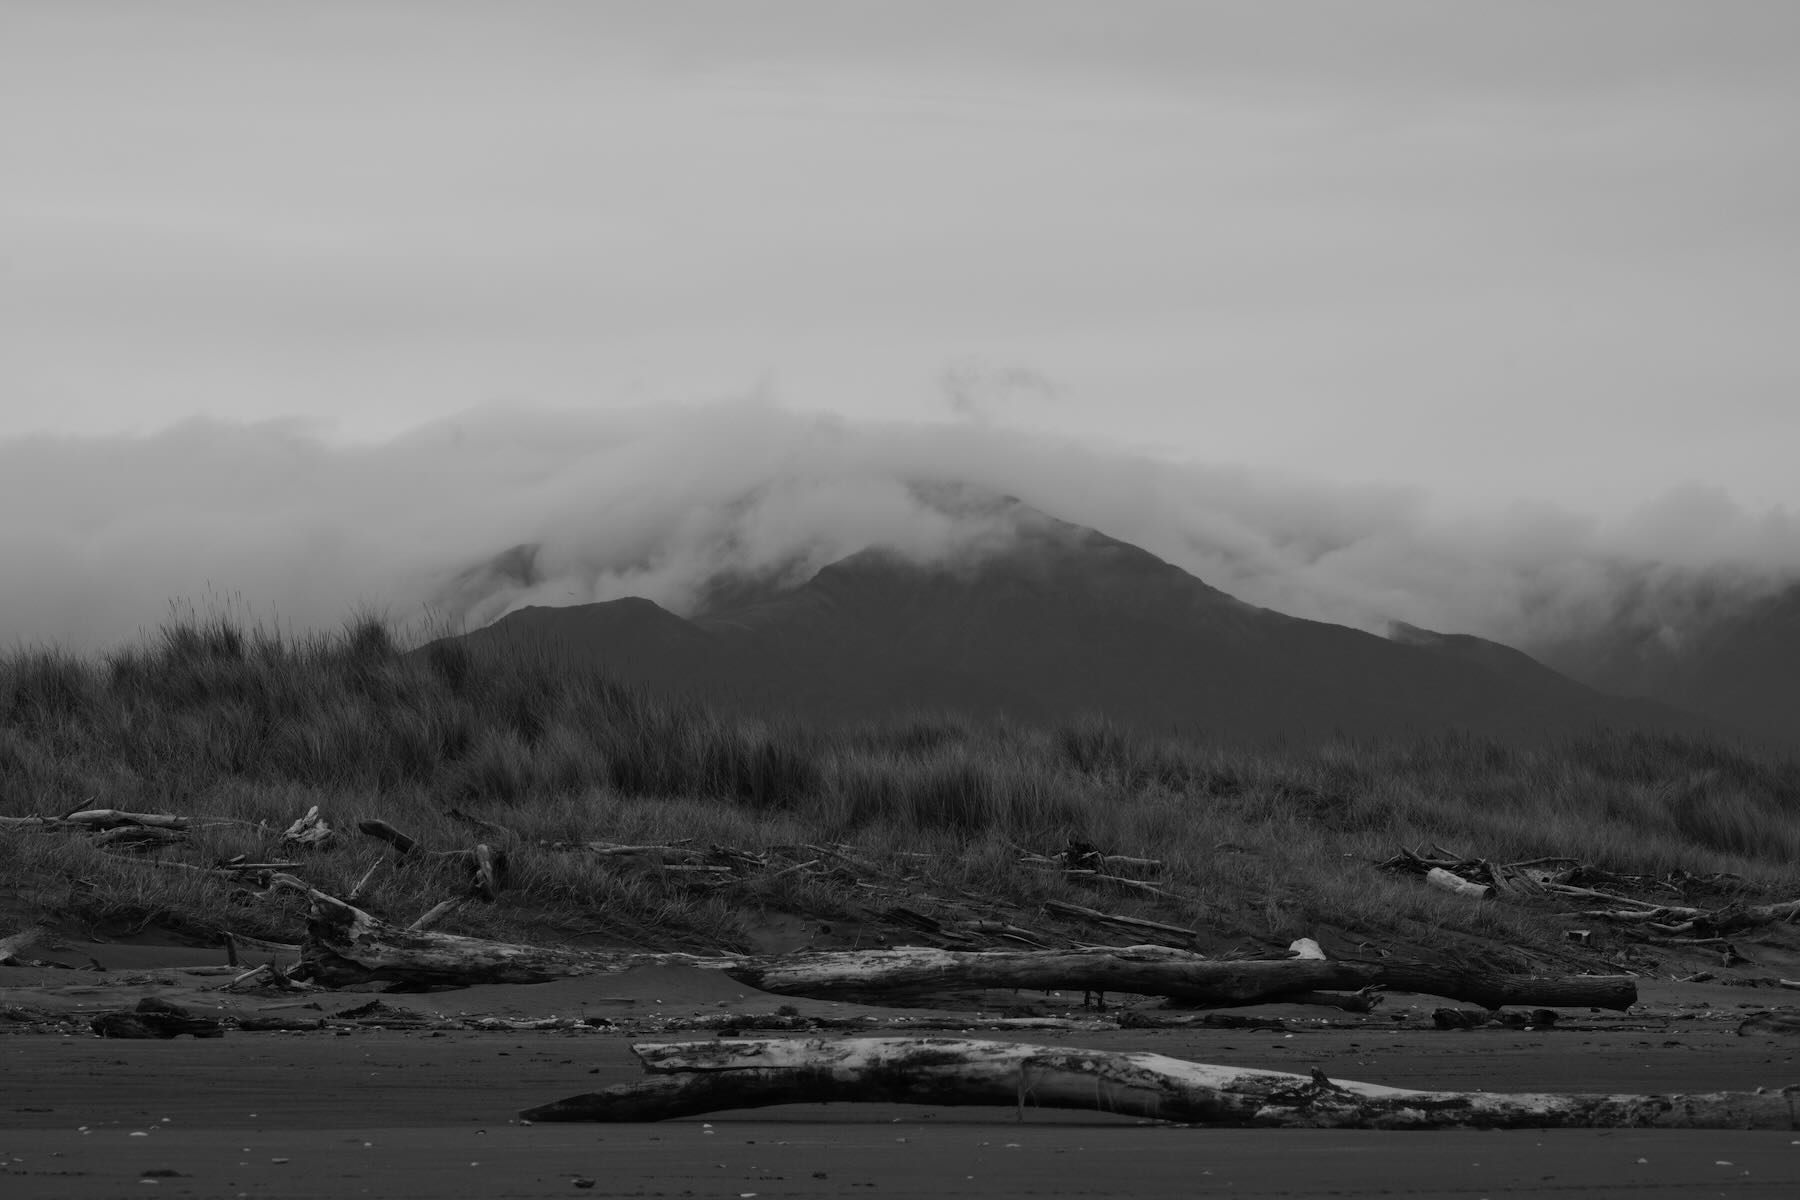
From one part of the beach this view of cloud snugging round the Tararuas.
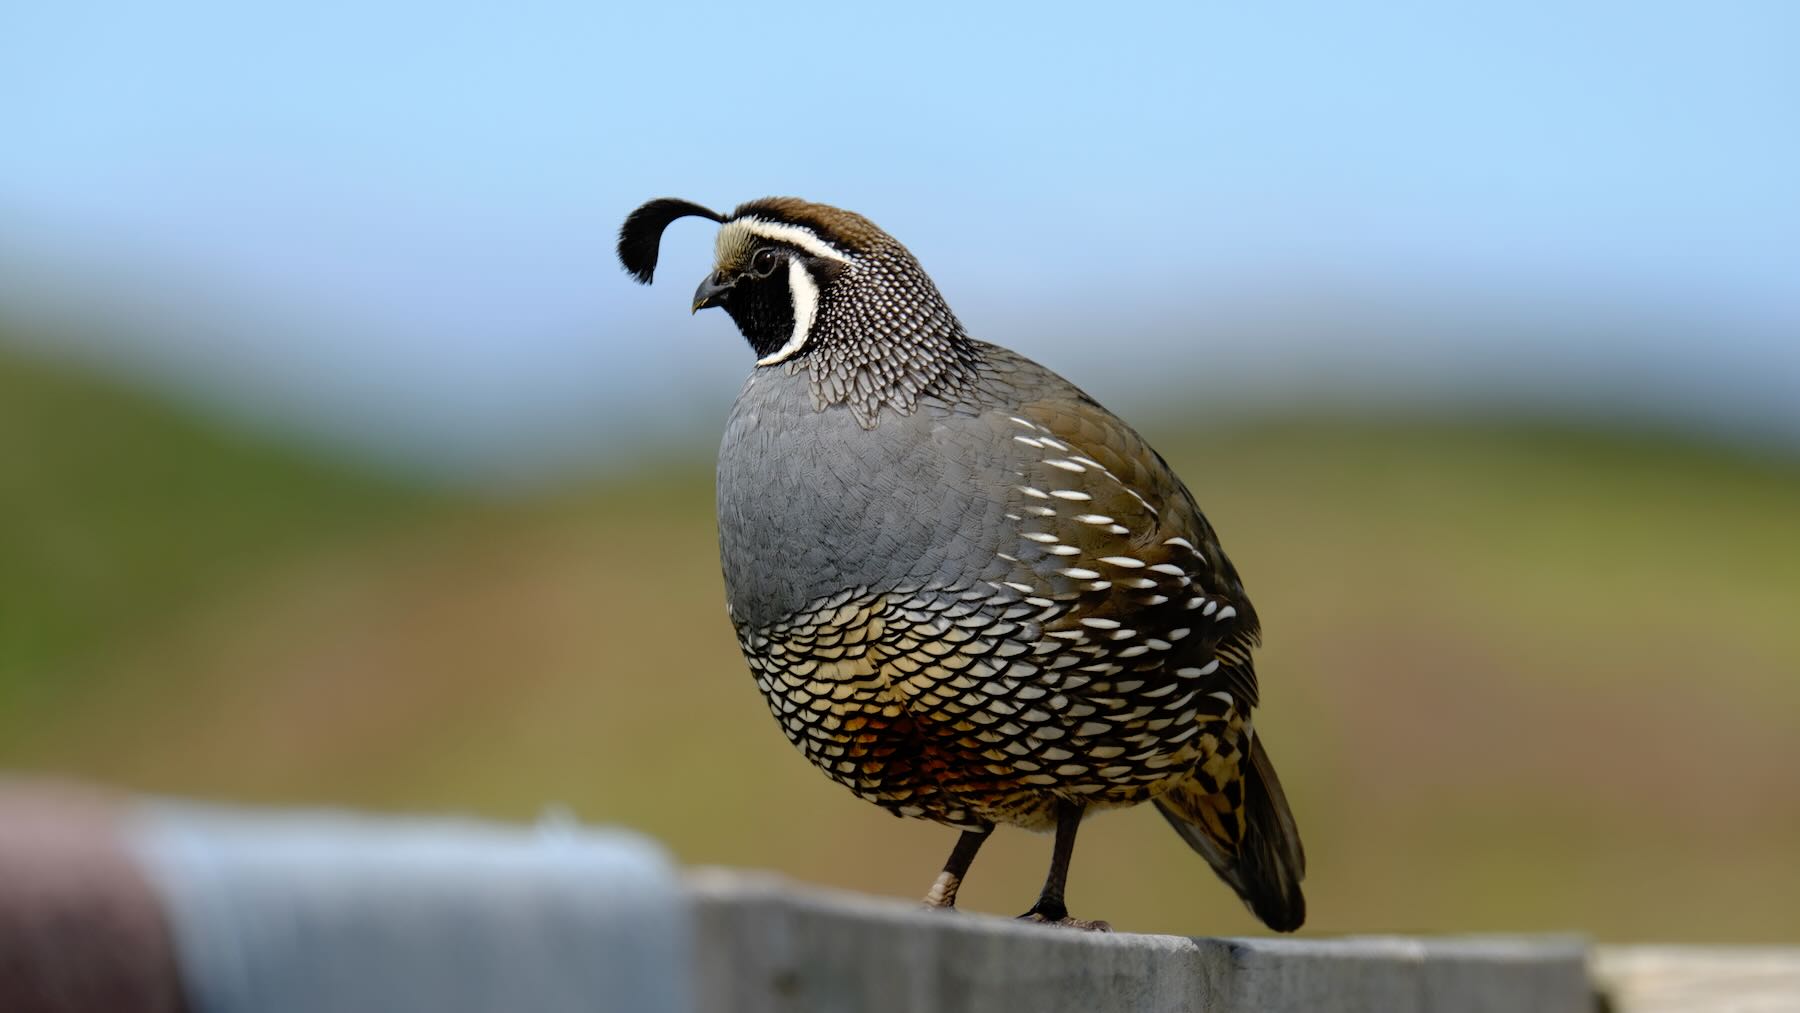
I was heading to the deck when I pulled up short. A California Quail (a rare and occasional visitor in these parts) was hanging out on our deck railing. It waited quietly while I took a bunch of photos. ❤️ 🐦
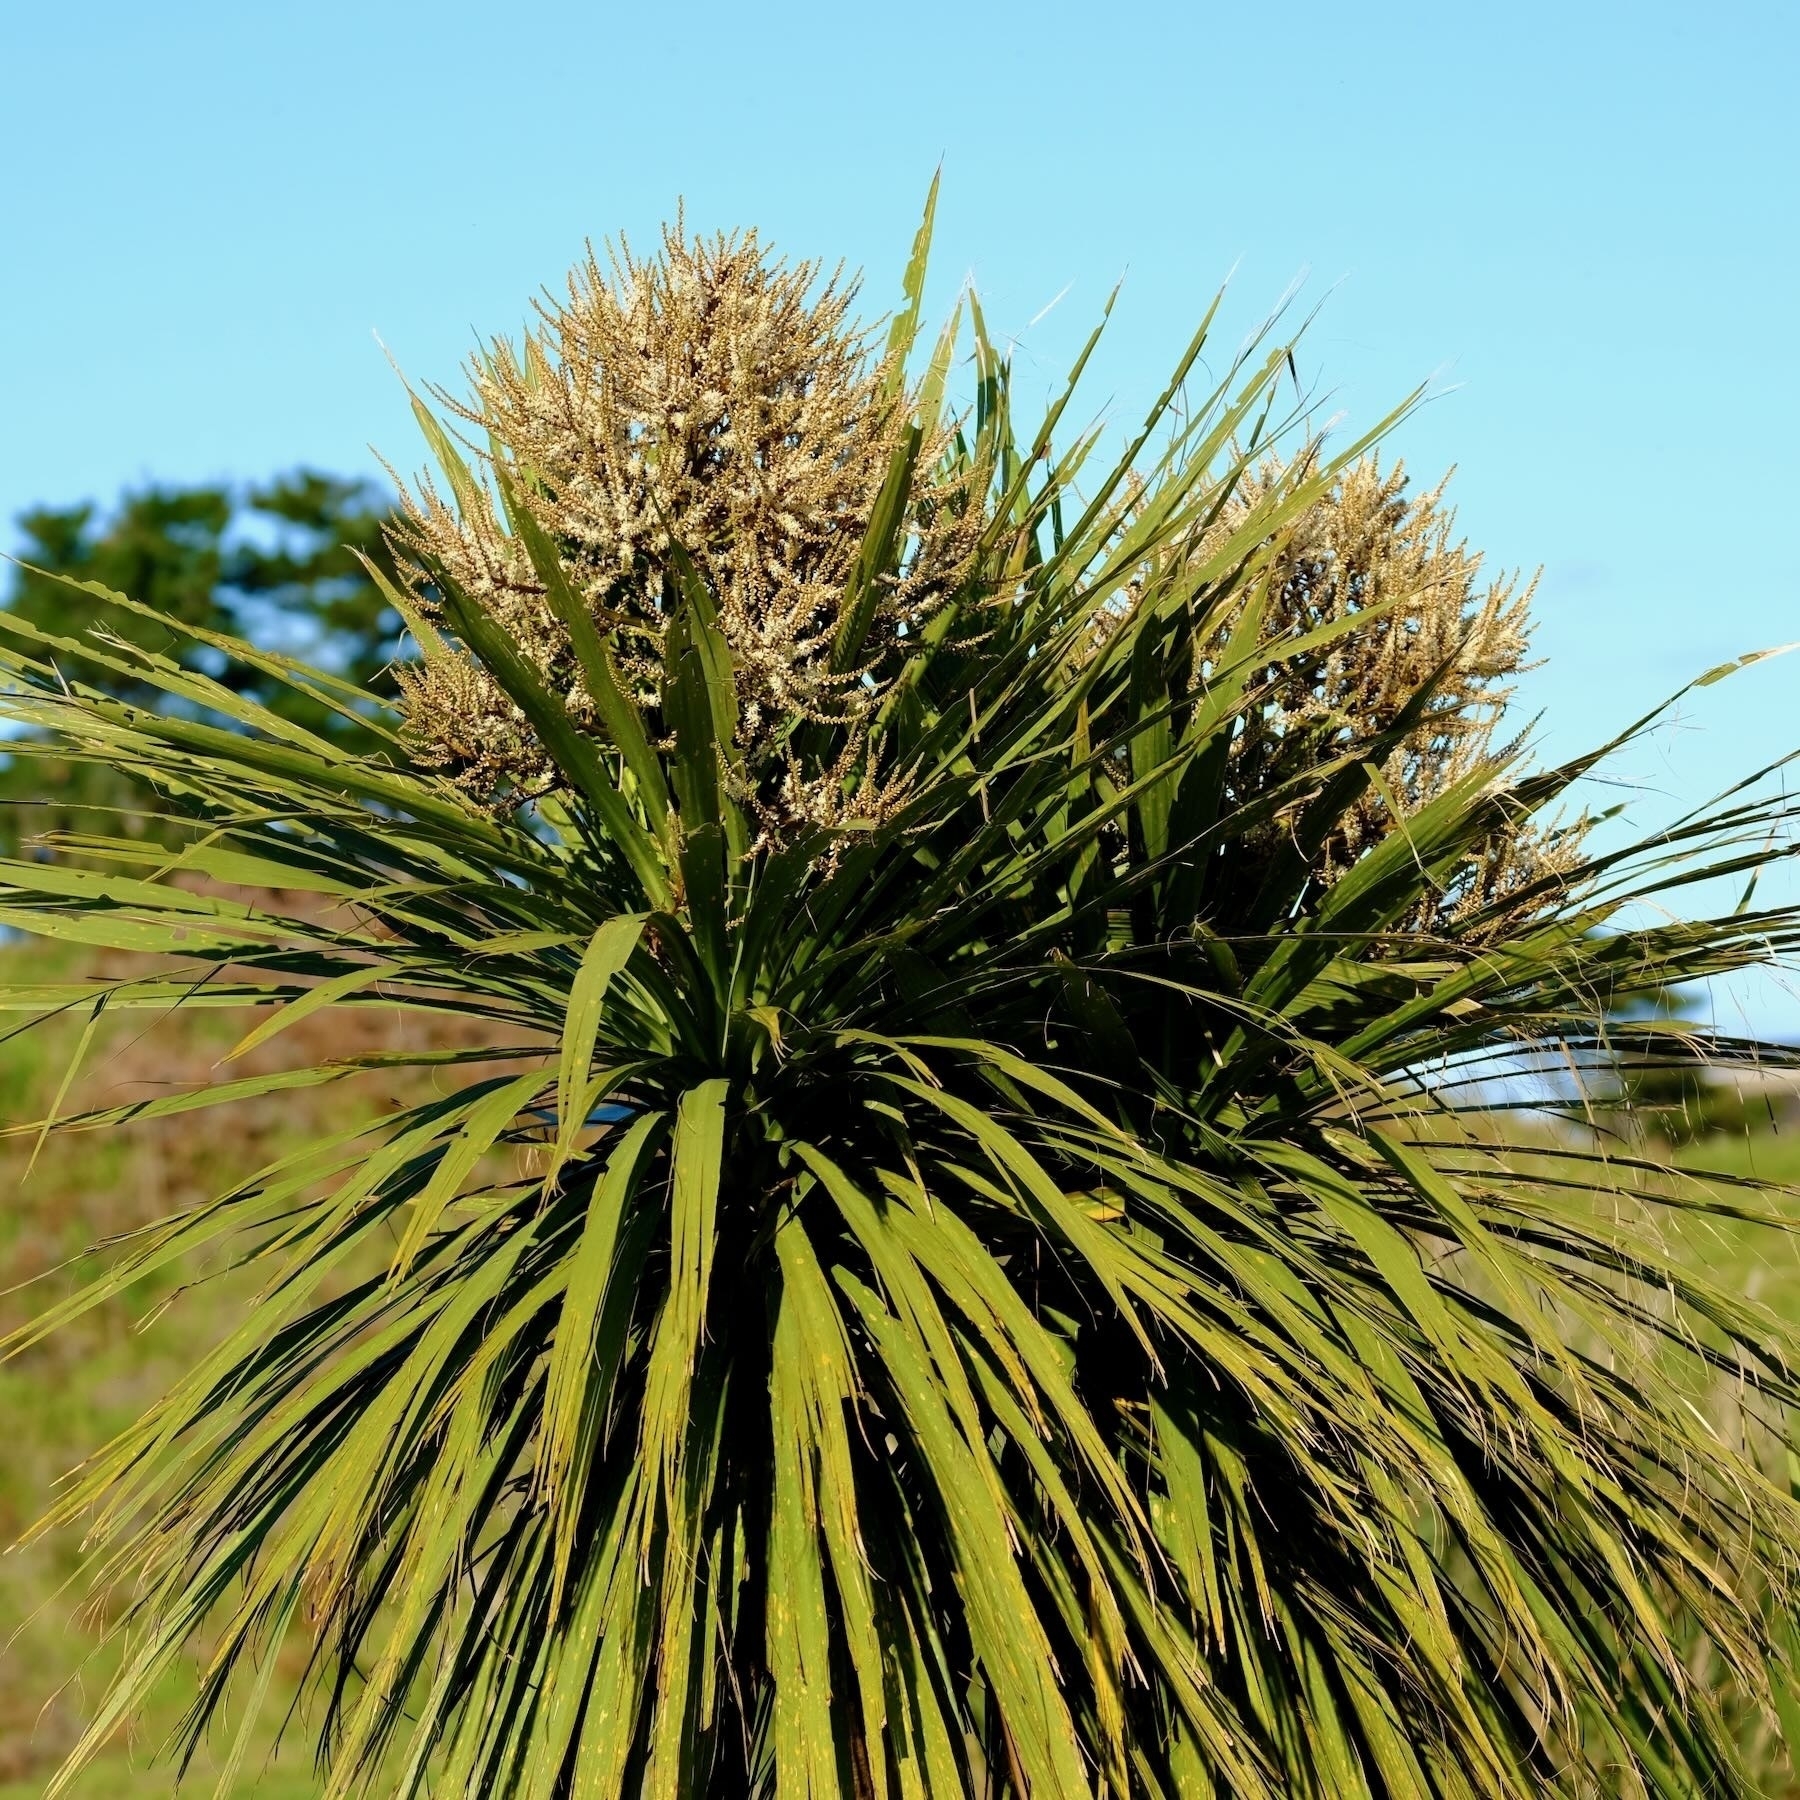
A Day In The Life Photo Challenge 2022. Taken at 08:40 at Waikawa Beach, Horowhenua, Aotearoa. Flowering Ti Kouka (Cabbage tree).
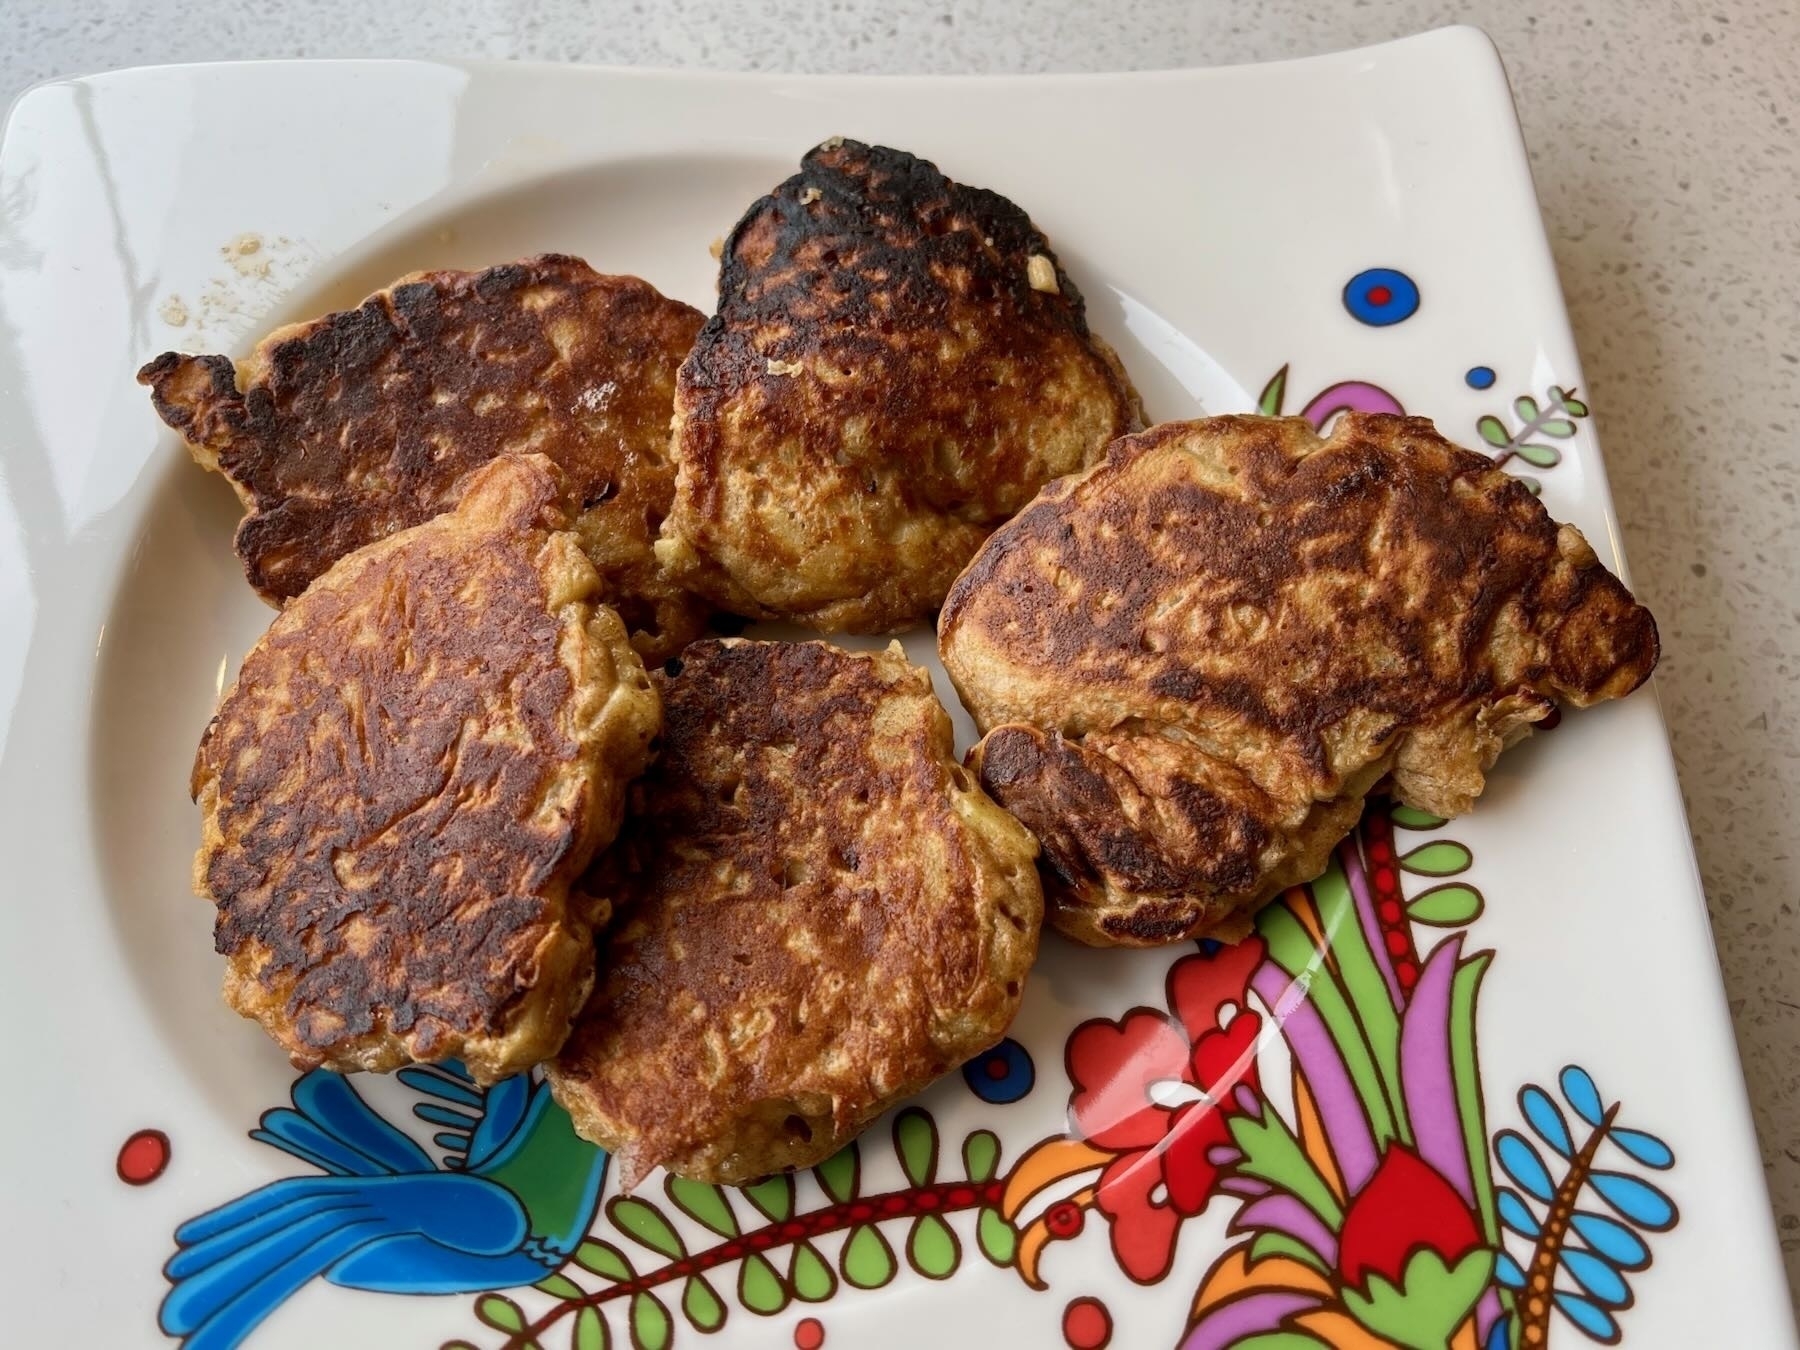
I tried Mini Apple Pancakes Recipe. Turned out I didn’t have Greek Yoghurt so used 1 tablespoon Sour Cream instead. Sugar, egg, cinnamon and apple — what’s not to like? But the recipe could do with editing. 1 Greek Yoghurt
is what quantity exactly? And what temperature pan?
Hmmm, looked up a crossword answer (a music track I’d never heard of). Now enjoying a blast from the past with Tracy Chapman, Annie Lennox, Janis Joplin, Grace Jones, Joan Armatrading and other greats from my ‘yoof’. Photo.

I’ve come to like this series, and with some very interrupted sleeps I read my way through these fairly quickly. They’re good entertainment on a sleepless night. The Rina Martin Murder Mystery Box Set Books 1–4 by Jane Adams. 📚

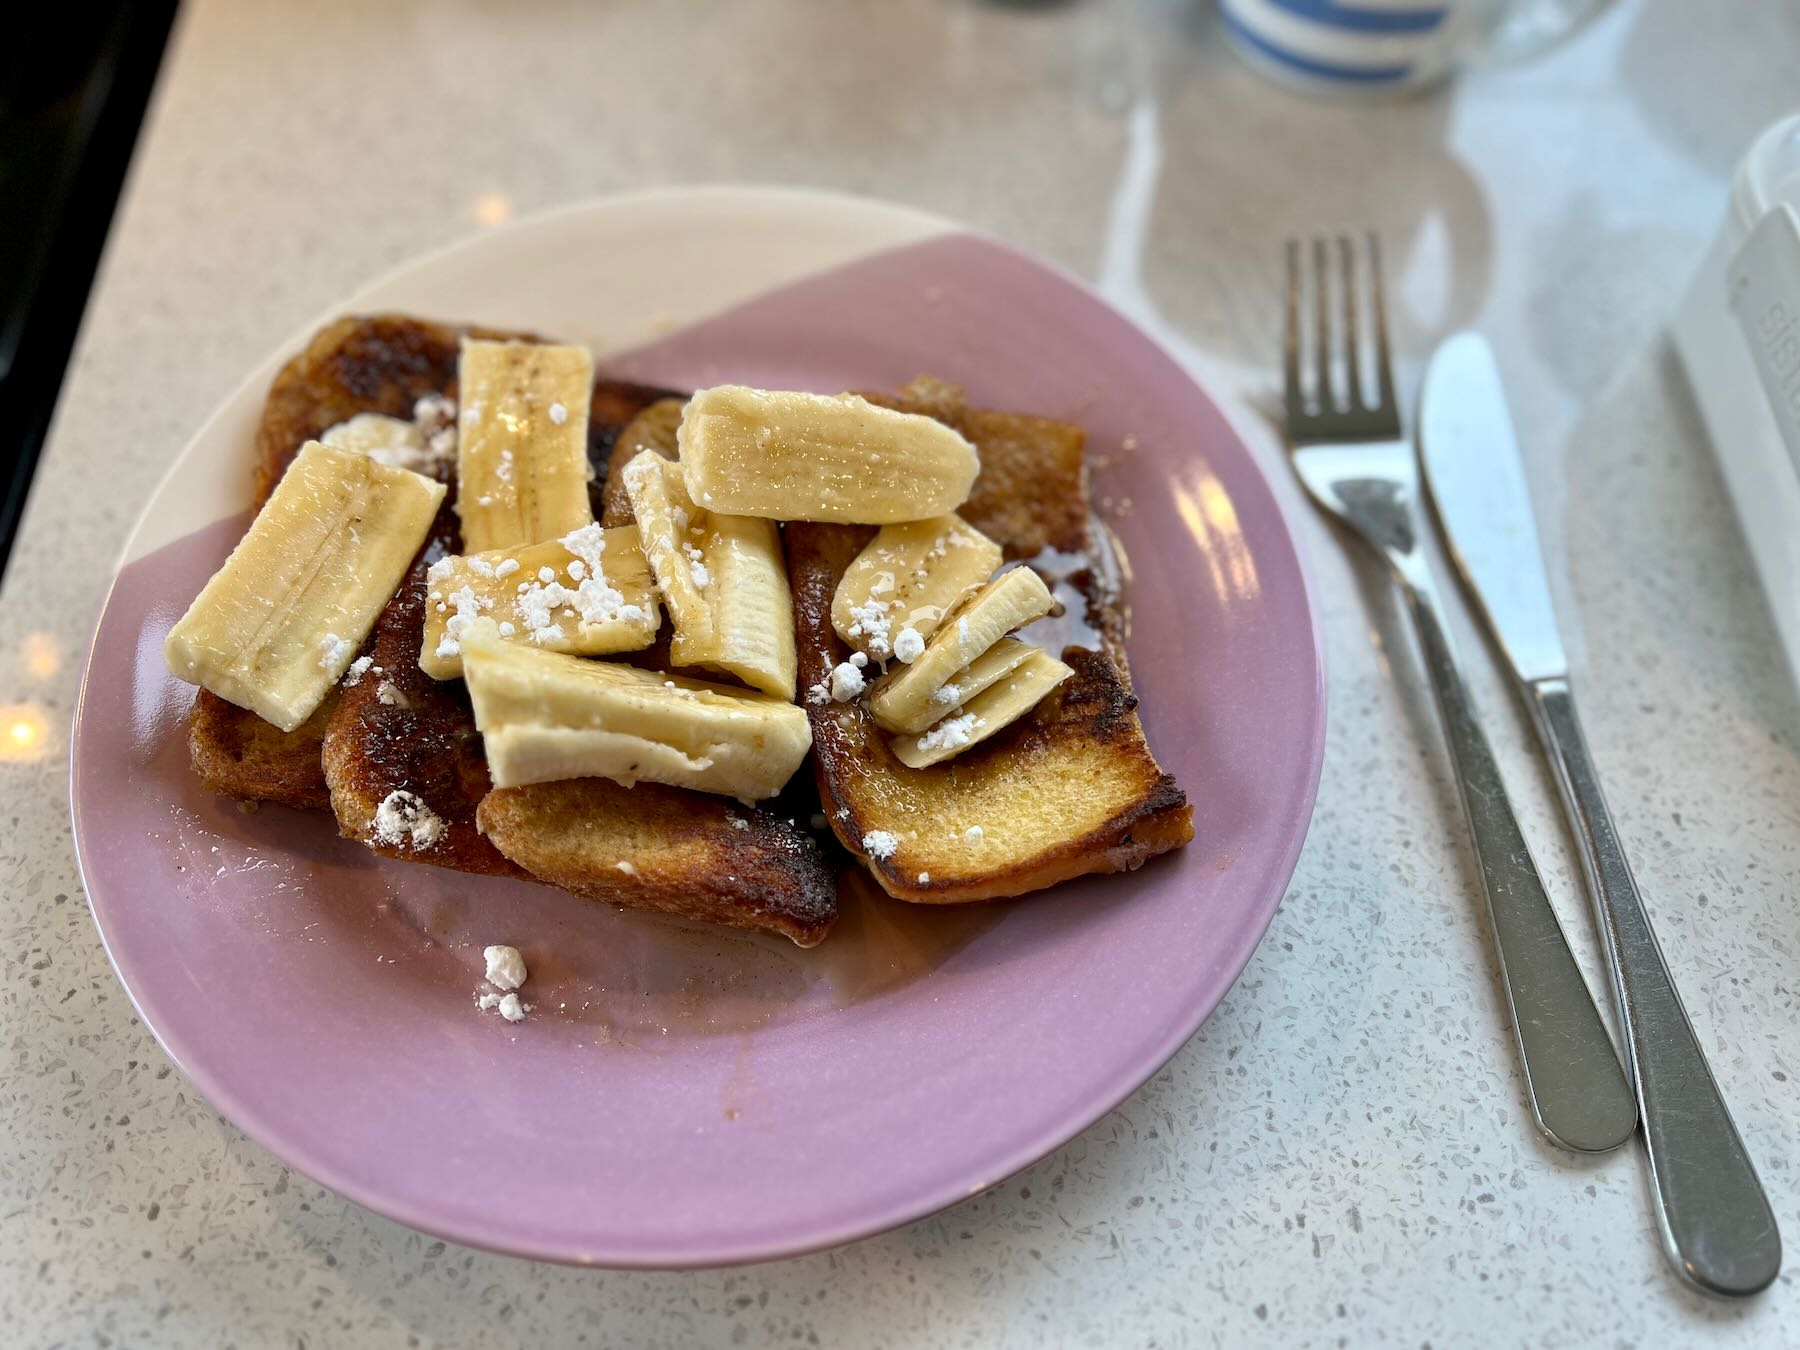
I made French toast today for the first time and served it with icing sugar, sliced banana and maple syrup. It was pretty good.
It was a great way to use bread from a fresh loaf that didn’t taste as good as usual, and six of a mounting number of fresh quail eggs.
I’m looking forward to A Day in the Life of Micro.blog Photo Challenge. Now to figure out when it starts in my timezone (Aotearoa New Zealand) … Hmm, adding it to my Calendar tells me that’s 6 am on 14 October 2022.
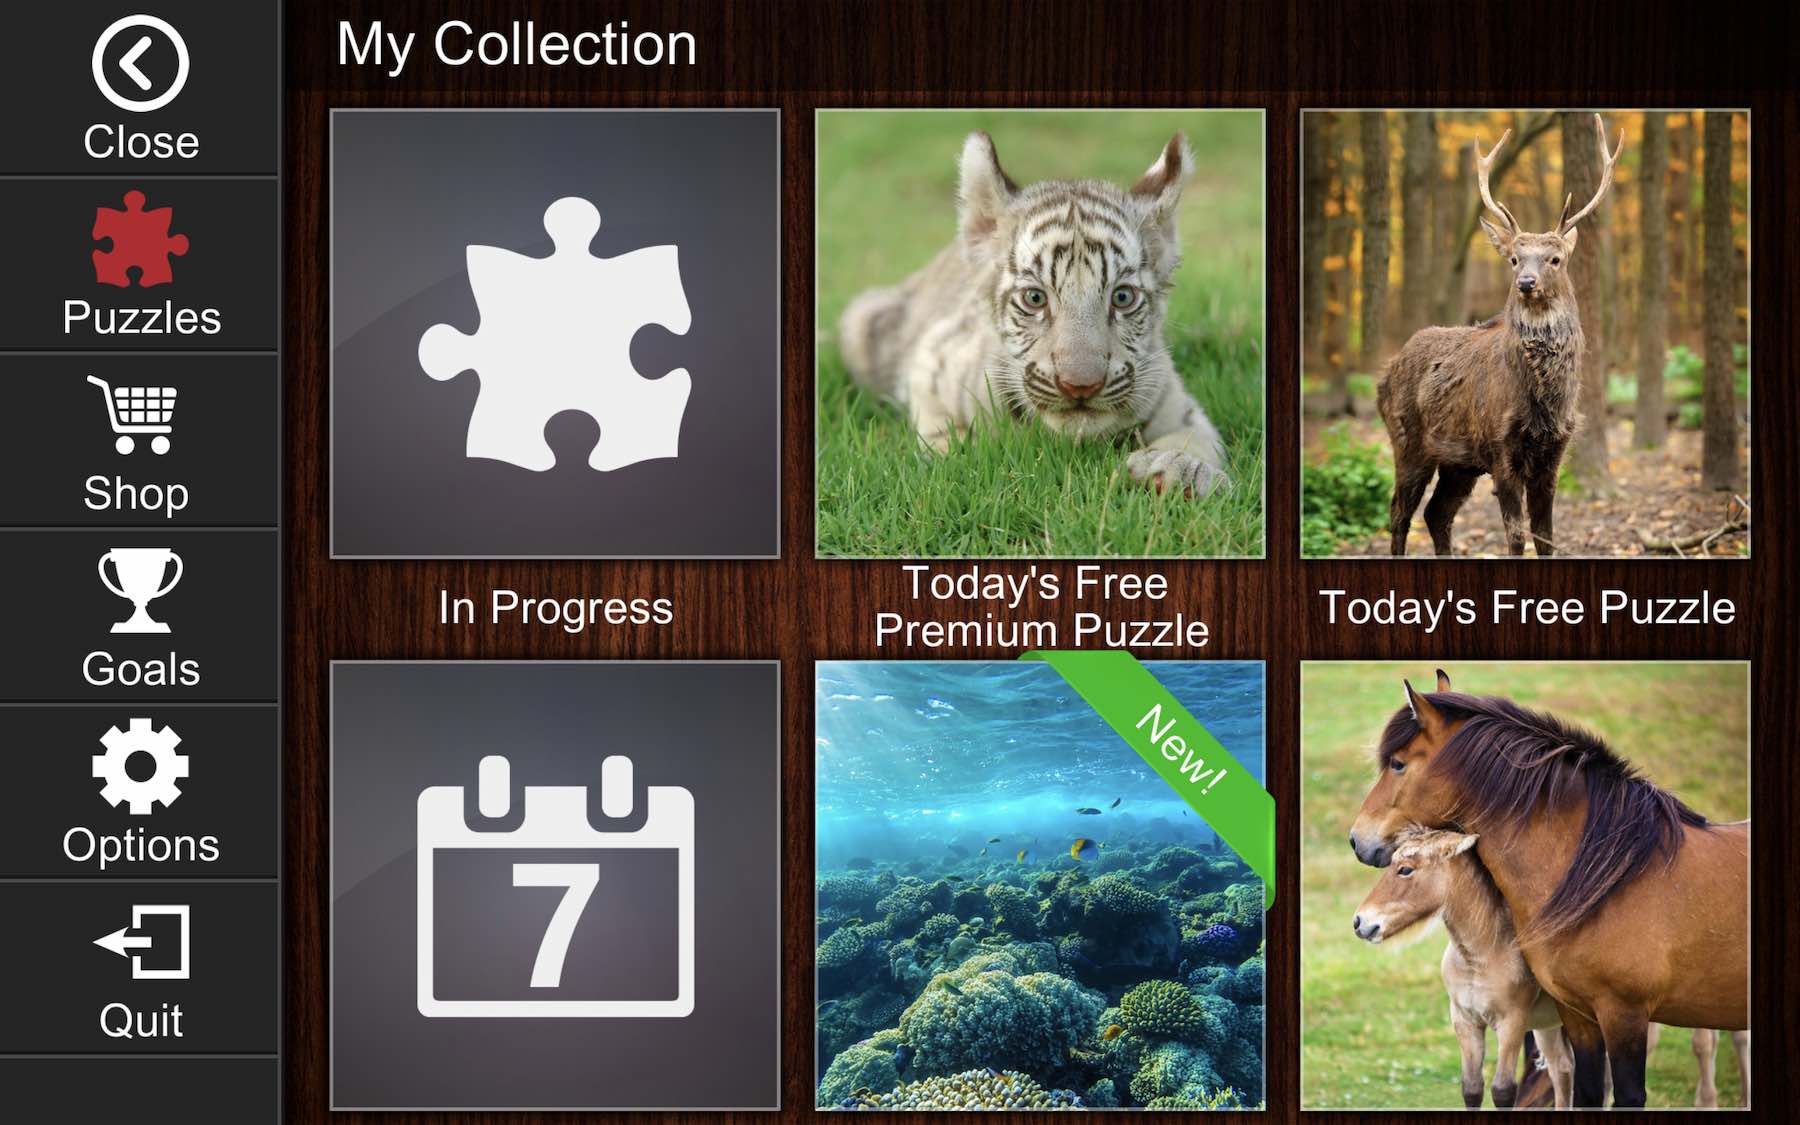
I’ve owned Jigsaw Puzzle Epic for years, used to play, fell out of it for a few years, and now do a puzzle or two per day.
Thank goodness for the Wacom graphics tablet I’ve owned for years, also fell out of using and also rediscovered recently. It makes moving pieces easier.
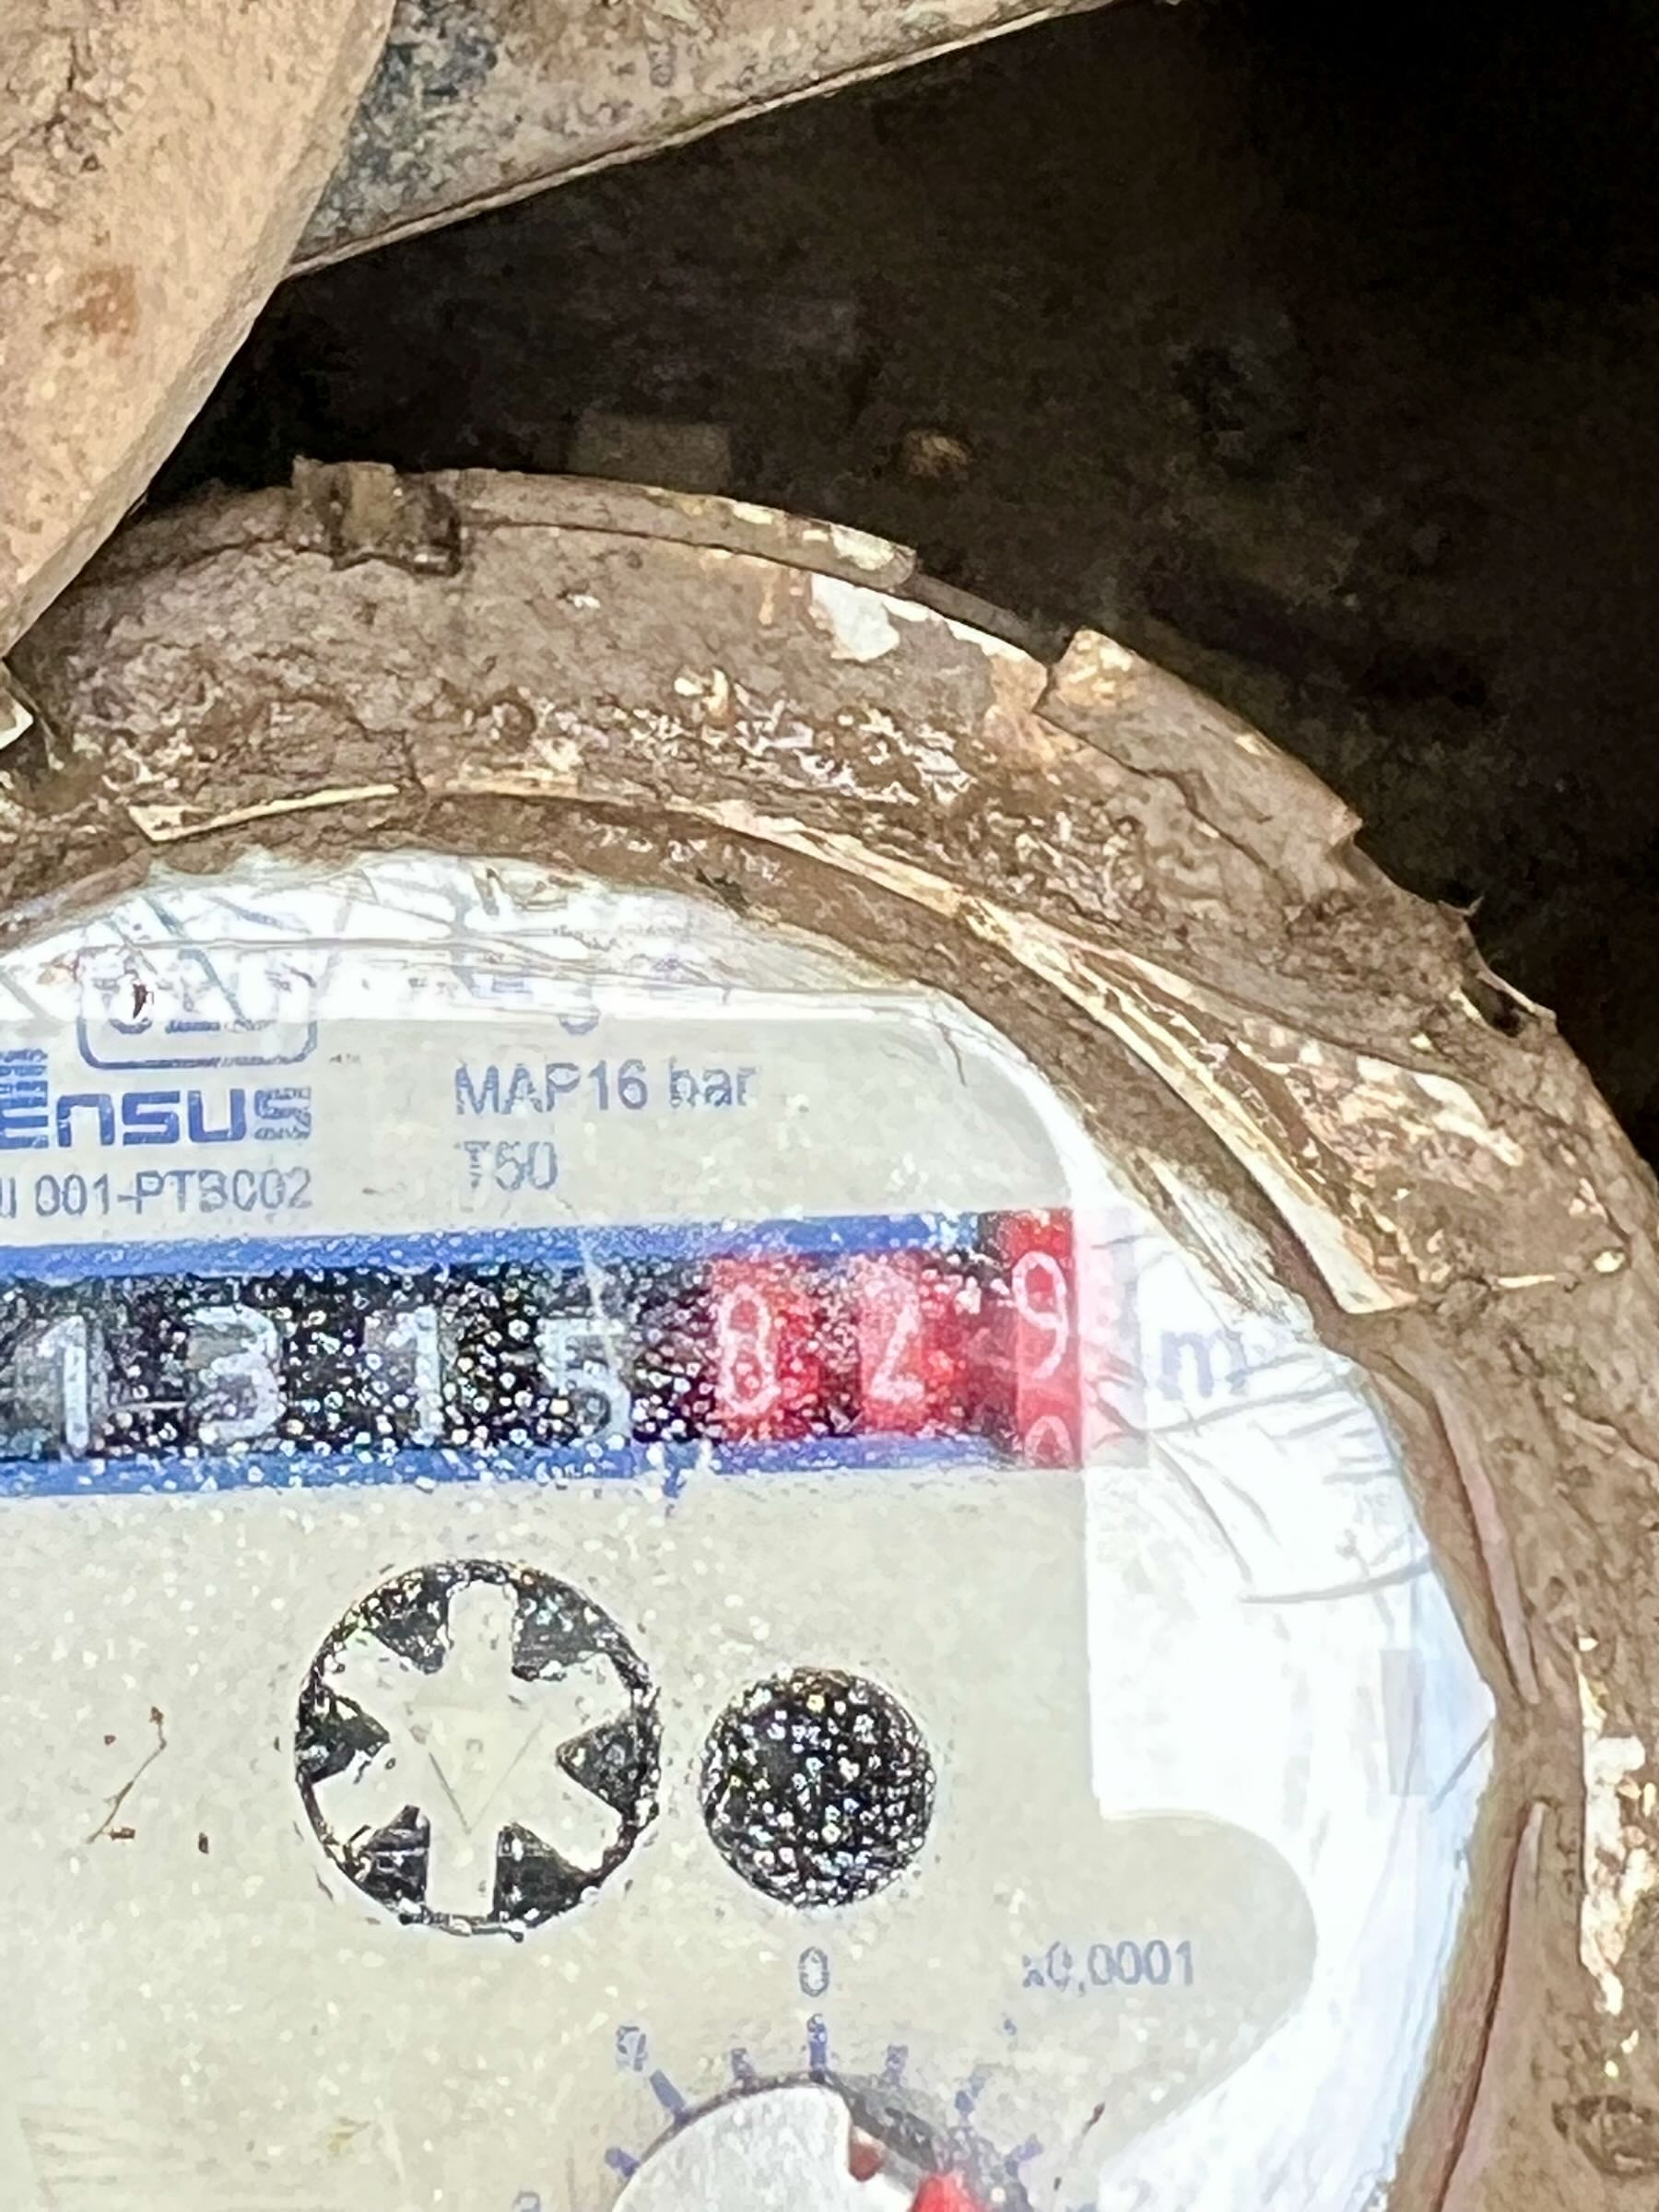
Our tenant has left the house we’ve been renting out and the estate agent is now in charge of selling it. One of today’s jobs was to record the water meter reading to charge the tenant for water she’s used since the last bill.
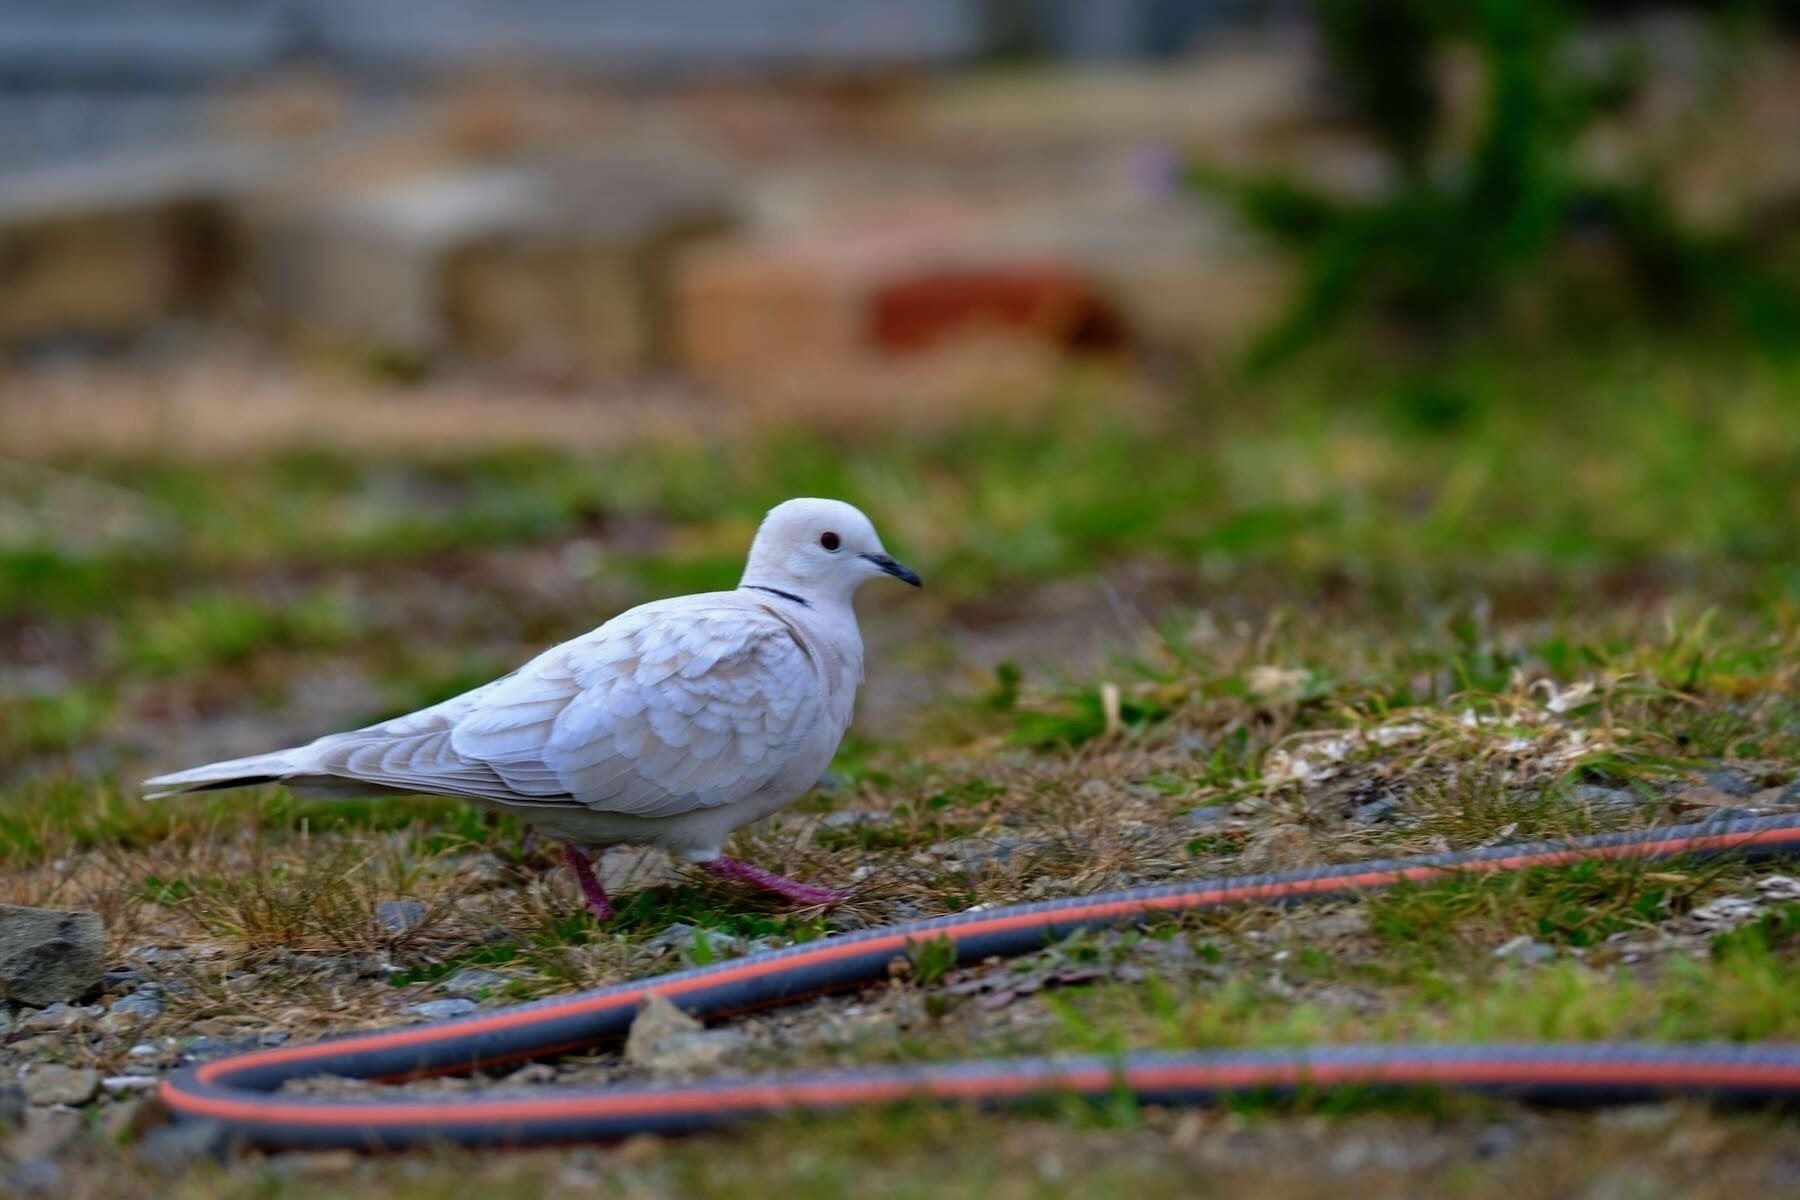
One of our local ring-necked doves was hanging round by the house this morning. Very convenient! 🐦
At least my good old point and shoot iPhone captured this small flock of Canada Geese flying by. Good way to avoid operator error.